
Remember my earlier post on Healthy Midway Food?. After reading a post about grilling brats on the Lodge Cast Iron site, I modified my method with tasty results. Take a large cast iron skillet, add the contents of one can of beer, then add a package of your favorite polish sausage or bratwurst. Bring beer to a boil then reduce to a simmer. Cook until all the beer evaporates (approximately 30 minutes), then turn the sausages to brown on all sides. You will have delicious and beautifully browned sausages! I sauté sweet peppers and onions to top the sausages. Yummy!
Tag Archives: Lodge cast iron cookware
Hasty Tasty Rotisserie Chicken
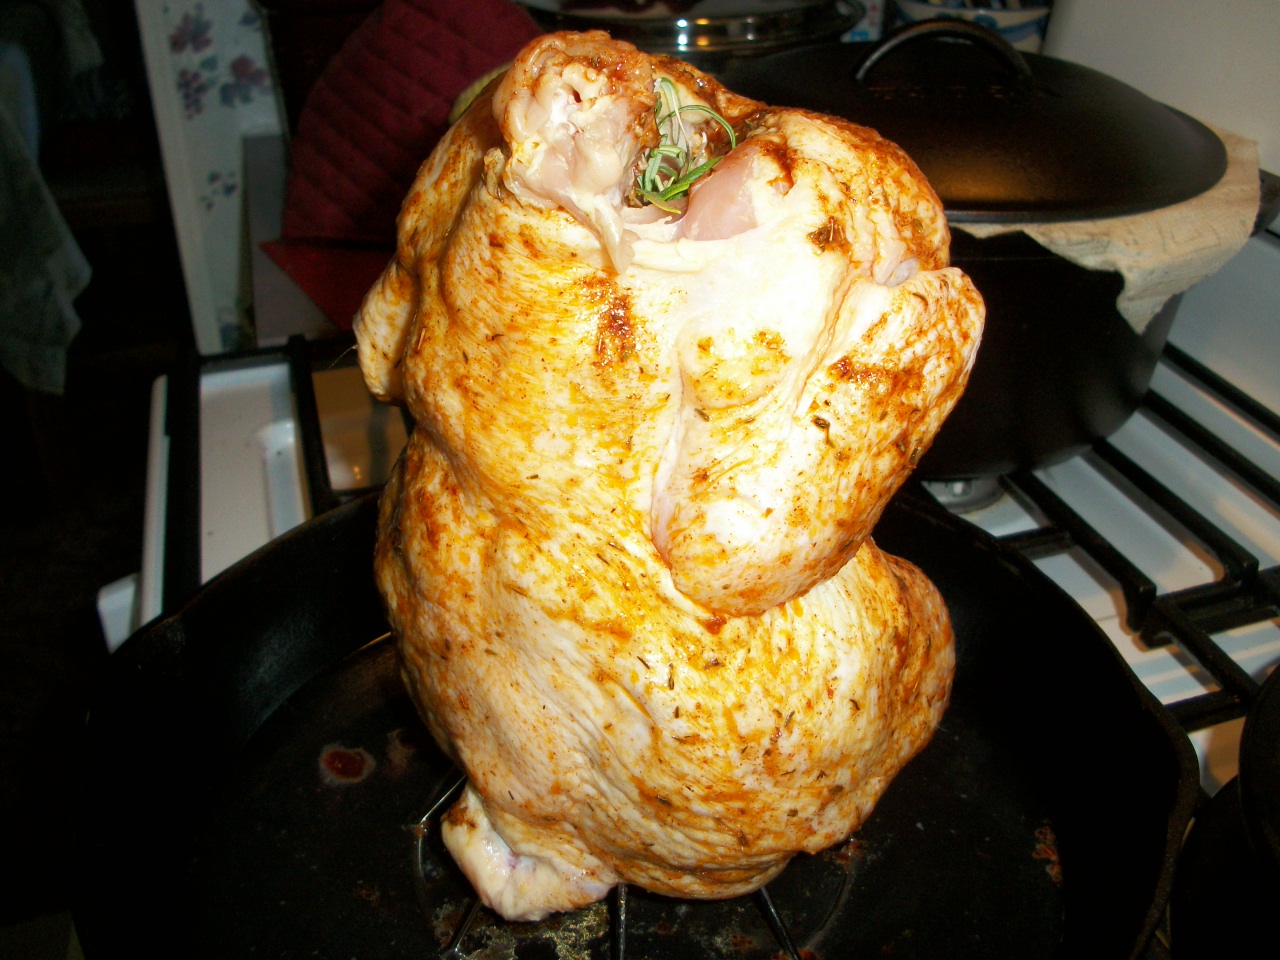
I enjoy the convenience of a supermarket rotisserie chicken, but unless it’s on sale, it costs as much as $8 for about a 3 pound bird. Not only do I save money cooking my own; I control the ingredients. My family agrees that mine tastes better, too. So here is how I make rotisserie chicken in the oven.
Tools: an oven, a cast iron skillet and a vertical chicken roaster stand.
Ingredients: 1 3½ pound fryer (organs and neck removed–save for making stock) and a spice rub.
My spice rub of choice:
- 1 tsp. pink Himalayan salt or Kosher salt
- ¼ tsp. cayenne pepper
- ¼ tsp. freshly ground black pepper
- ½ tsp. dried thyme
- ½ tsp. smoked paprika
- ½ tsp. garlic powder
- ½ tsp. onion powder
- ¼ cup olive oil
For optional gravy:
- 2 Tablespoons all purpose flour
- 10 ounces chicken stock or broth
Directions for Hasty Tasty Rotisserie Chicken:
- Place chicken on vertical chicken roasting stand. Position stand in the center of the cast iron skillet.
- Preheat oven to 450° Position rack to a low setting to allow air flow around vertical chicken.
- Combine all ingredients for rub.
- Apply rub over chicken. (Optional: I add a sprig of fresh Rosemary to the top)
 Place chicken in center of oven rack.
- Lower oven temperature to 425° and set timer for one hour.


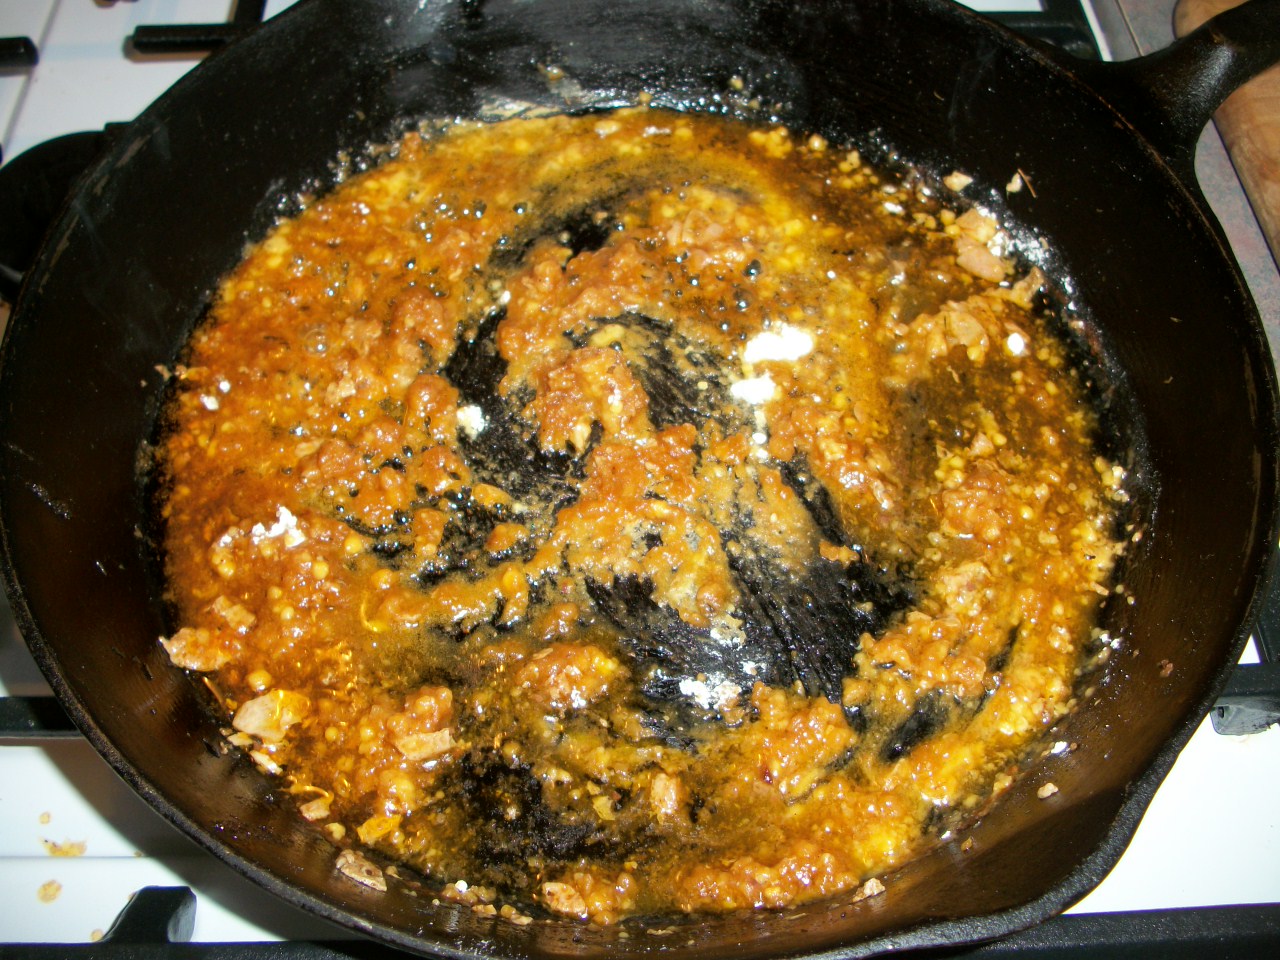
- After one hour, carefully remove skillet and chicken from oven. Let stand for 10 minutes.
- Remove chicken stand to a cutting board or platter. Add 2 Tbsp. all-purpose flour to drippings in skillet.
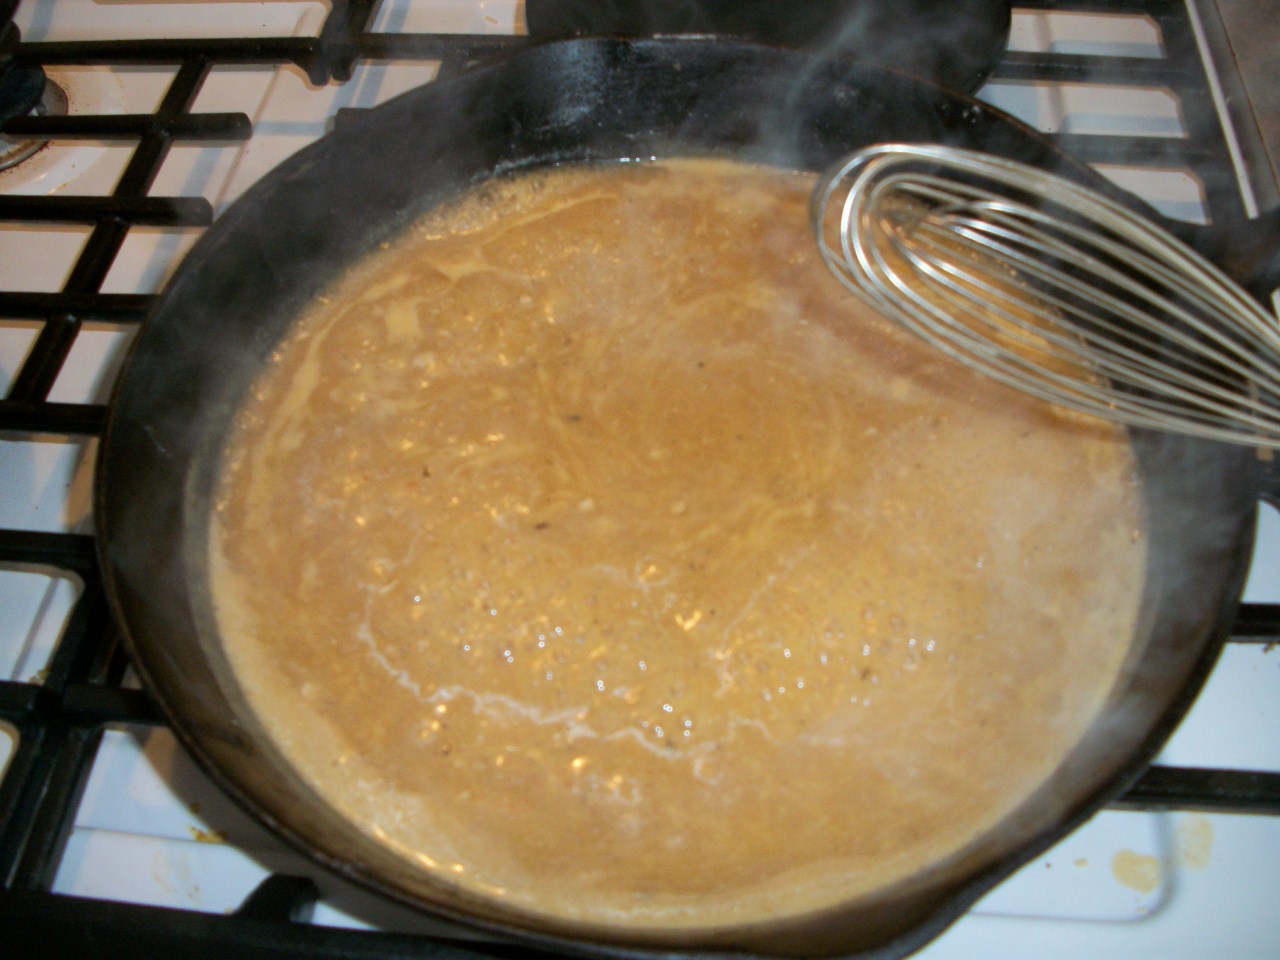
- Place skillet over medium-low heat and stir in flour to make a roux.

- Gradually whisk in the chicken stock. Simmer over low heat until gravy thickens. Whisk often.

- Carve chicken into serving pieces and serve with the gravy and sides of your choice.


Filed under chicken
Salsa Time!
I’ve posted in the past about making salsa in my Vitamix. Today I have a special guest who offers a flavorful twist to salsa. As soon as I pick up a fresh bunch of cilantro, I’m making this recipe. I grow my own jalapeño peppers and herbs but fail miserably at keeping cilantro alive. 😦
Today’s recipe is a guest post by Kristin, a writer for PAM and other ConAgra brands. She resides in Chicago, IL and enjoys trying new recipes on the weekends. Her favorite dishes include poached eggs in the morning, throw-whatever-is-in-the-fridge salads for lunch, and vegetable-heavy stir fries for dinner. She’s always on the hunt for unexpected yet delicious food combinations. Please welcome food blogger Kristin Kruk:
August is the Sunday of summer. Friends and family are making the most out of their last few weeks of sunshine and blue skies before fall kicks in. When you get an invitation to that last minute summer barbeque, come prepared with a zesty appetizer to surprise everyone’s taste buds. Bring a bowl of grilled tomato salsa with a bag of your favorite tortilla chips as an appetizer to the party.On a time crunch? Don’t worry about grilling outside. A cast iron pan will do the trick because it gets hot and retains heat.
How to grill inside:
- Evenly spray PAM Grilling Spray on the cast iron pan.
- Place pan on stove top on medium-high.
- Reduce the heat to medium-low once the pan gets hot.
Now you’re on your way to a quick grilled tomato salsa!
Ingredients:
- PAM Grilling Spray
- 1½-2 pounds of tomatoes (try an assortment), sliced in half
- 1 jalapeño , sliced in half
- 5 green (or red) onions, chopped
- ¼ cup of cilantro, chopped
- 1 teaspoon garlic salt
- ¼ teaspoon ground cumin
- Optional ingredients: ½ can of black beans or corn kernels
Directions:
- In a medium bowl, mix cumin, garlic salt, onions and cilantro. If optional ingredients were used, combine as well. Set aside.
- See “How to grill inside” instructions above.
- Once the burner is set to medium-low, grill tomato and jalapeño slices.
- Rotate so each side is grilled for 3 minutes. When each side is slightly blackened, remove from grill.
- Chop tomato and jalapeño slices into cubes. Dump into the medium bowl (Step 1).
- Refrigerate until ready for use.
This quick and simple appetizer complements any picnic or outdoor outing at the end of summer. Enjoy!

(Cheryl note: I do all my indoor grilling on a Lodge cast iron grill pan (sprayed with PAM). It’s affordable, retains heat, and leaves nice grill marks on food–just like an outdoor grill but without the mess!)
Filed under Appetizers, Cilantro, condiments, Healthful Eating, Mexican, Recipes, salsa, tomatoes, Vegetables
Crispy Fried Fish
You don’t have to deep-fry fish to get a crunchy coating. I pan fried catfish fillets in just one tablespoon of safflower oil, and my family gave me rave reviews. Crispy without tasting greasy, this method also works on chicken tenders.
RECIPE
Crispy Fried Fish
Serves 4
Ingredients:
- 4 4-5 oz. fillets of catfish or any firm white fish
- 1 Tbsp. safflower oil
- 1 egg
- ¼ cup flour
- ½ cup Panko bread crumbs
- 2 Tbsp. grated cheese (I use Parmesan, but cheddar works, too)
- 1 tsp. Kosher salt
- ¼ tsp. freshly ground pepper
Directions:
- Preheat a large cast iron skillet over medium heat.
- Salt and pepper the fish.
- Beat one egg. Set up a breading station with flour, egg wash, and bread crumbs.
- Mix the cheese in with the bread crumbs.
- Add oil to the skillet.
- Dredge fish fillets in flour first, then egg wash, then bread crumbs/cheese mixture. Be sure fish is covered thoroughly.
- Place each fillet in the hot oil. Do not move. Cook, uncovered for at least five minutes or until fish browns along the edges.
- Carefully turn each fillet and cook an additional 5 minutes.
- Plate and serve immediately.

Fried fish doesn’t have to be greasy!
Filed under cooking, Fish, Healthful Eating, panko, Recipes
