Category Archives: pressure cooking, Instant Pot

Pork Tenderloin—Hasty and Tasty

My grocer had pork tenderloins on sale this week buy-one-get-one-free (BOGO). Pork tenderloin, not to be confused with pork loin, is a lean and tender cut ideal for a Hasty Tasty Meal. It’s easily over cooked, which is why it’s crucial to distinguish tenderloin from loin. Yet it’s also difficult to pass up a BOGO, so I decided it was time to master pork tenderloin.

Baking or roasting pork tenderloin using a meat thermometer (internal temperature of 145°) is a foolproof cooking technique, yet I wanted to use my pressure cooker. Why? We’re campers and don’t travel with an oven or even a microwave oven. But I do have a 3 quart Instant Pot Duo Mini in my travel trailer. Even when “roughing it,” I like to prepare good meals.

I experimented with steaming the tenderloin on a trivet over the liquid as well as braising in the cooking liquid. I tried chicken broth, water, and apple juice for the cooking liquid. All techniques produced edible meat, but here’s my favorite and most successful recipe.

RECIPE

Hasty Tasty Pork Tenderloin Roast

Serves Four

Ingredients:

  • 1 pork tenderloin, approximately 1.5 pound
  • 2 tsp. Canola oil or your choice vegetable oil
  • 2 cloves garlic, minced
  • 1/2 fennel bulb, sliced
  • 1 apple (gala or Granny Smith works well), sliced
  • 1/2 onion, sliced
  • 1.5 cups water
  • 1 Tbsp. unsalted butter
  • Kosher salt
  • Freshly ground black pepper

Directions:

  1. Preheat multi cooker on sauté mode.
  2. When heated, add oil and brown all sides of the tenderloin.
  3. Remove tenderloin to a plate. Add fennel, apple, and onion to the pot and sauté approximately 5 minutes. Salt and pepper. Turn off heat.
  4. While vegetables sauté, use a sharp paring knife and make slits evenly throughout the meat to insert the garlic pieces.
  5. Pour water slowly into the pot. Using a wooden spoon, deglaze the pot of any cooked-on bits.
  6. Return tenderloin to the cooker and place atop the fennel, apple, and onion slices.
  7. Seal cooker and set pressure cooking time for zero minutes (or lowest time setting available).
  8. After cooking time completes, hit cancel. Do not allow cooker to “keep warm.” Allow pressure to drop on its own one minute and then vent.
  9. Open cooker, remove meat to a plate, and pour cooking liquid into a heavy duty blender (I use a Vitamix) to purée.* Return liquid to pot, and hit sauté.
  10. While liquid reduces, allow tenderloin to rest. Tent with foil to keep warm. After the cooking liquid boils down to desired thickness, turn off cooker and add butter. Salt and pepper sauce to taste. Slice the tenderloin and serve drizzled with the sauce.

Browned tenderloins cook quickly.

Whisk in butter right before serving.

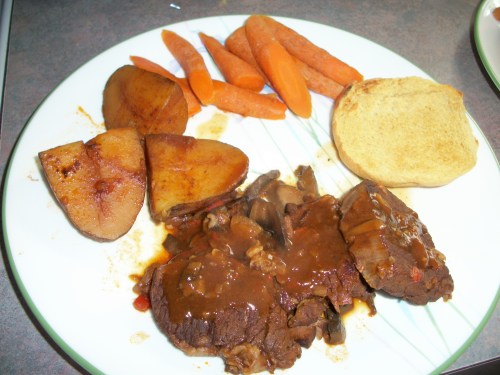
Serve with sauce and side dishes of your choice.

*For a chunkier sauce, mash the cooked apple, fennel, and onion mixture with a potato masher.

Leave a comment

Filed under Healthful Eating, pressure cooking, Instant Pot

Another Pressure Cooker?

Yes, today I got the latest Instant Pot, the Duo Evo Plus. If you’re rolling your eyes and wondering why, read on.

If you own an Instant Pot, there’s no reason to upgrade, so relax. But if you’re in the market for a new one, check out this model because the Instant Pot company listened to all the feedback on what they could improve on their multi cookers and implemented suggestions into this model. Here’s what’s new and what I like:

  • Progress bar. No more guessing when the pot will pressurize.
  • Handles on the inner pot. No more awkward extractions with silicone mitts.
  • More cooking programs, although I still have flexibility to manually set time and pressure.
  • Spare gasket. I had to order spares for my other multi cookers.
  • Better venting. Reduces burn risk from steam during quick depressurization.
  • Flat bottom inner pot. If I want, I can transfer my inner pot to or from my stove.
  • It sterilizes. The sterilize function takes away the guesswork.
  • Everything but the outer housing is dishwasher safe. Everything.

I probably missed some improvement but give me time. It’s still new to me.

UPDATE: America’s Test Kitchen just rated this model as the best multi-cooker for 2020!

Comments Off on Another Pressure Cooker?

Filed under Healthful Eating, kitchen equipment, pressure cooking, Instant Pot

Turkey Under Pressure

My husband loves turkey, and I indulge him because I love him and turkey, too. Turkey is an inexpensive protein. It’s not exclusively a holiday meal, either. We have turkey year around.

But we live in sunny Florida. Nobody wants a hot kitchen after using an oven for several hours, especially in summer. I researched alternatives (No to the indoor turkey fryer, and no to the electric roaster).  I’ve successfully pressure cooked and slow cooked a turkey breast with good results, yet never a full turkey (and I love the dark meat). 

After watching one too many Sunday morning infomercials for the 10-quart Power Pressure Cooker XL, in which Eric Theiss exuberantly shows off a whole turkey cooked in 40 minutes, I ordered one for a birthday gift for myself. I was skeptical because I want stainless steel pots, not nonstick-coated aluminum. The PPCXL has only the nonstick-coated aluminum inner pot. As far as I know, there is no stainless steel replacement pot that will fit it.  I resigned myself to the nonstick pot, though, and tested the cooker as a turkey roaster.

Oh my goodness! I am so pleased with the results, and so is my family. Now turkey dinners aren’t limited to cool weather months. There are a few tricks to my pressure cooked turkey, though. First, it must be no larger than 12 pounds. Mine weighed in a tad over 11. Second, use a bit of butter. I thoroughly greased the bottom of the nonstick inner pot with butter. I also put a little butter between the skin and the breast meat on either side of the wishbone. If you like crispy skin (we don’t eat skin), you’ll need to brown it under the broiler for 5-10 minutes before carving.  Finally, I let pressure drop completely before opening the cooker and removing the turkey. From prepping the turkey to serving it took a total of 2 hours, still much quicker than oven roasting.

As for the nonstick coated pot I detest, it fared well and cleaned up easily in hot soapy water. I baby it with nylon or silicone tools and gentle scrubbing, though. Except for the nonstick coated pot, I’m impressed with the performance of the 10-quart PPCXL. I own an older model PPCXL that’s noisier and a bit more difficult to use, so Tristar has made improvements I like. If you’re in the market for a large multi-cooker, consider the 10 quart Power Pressure Cooker XL. (Check out the video on YouTube for the infomercial) If you want something smaller, stick with Instant Pot or other brands that offer the stainless steel inner pot.

RECIPE

TURKEY UNDER PRESSURE

Serves 8-10

Equipment needed: 10 quart or larger pressure cooker. chef’s knife, measuring cup

Ingredients:

  • 2 Tbsp. unsalted butter
  • 1 whole turkey, 9-11 pounds, thawed
  • 1 onion, quartered
  • 1 rib celery, halved
  • 1 clove garlic. chopped
  • 1 carrot, halved
  • 1 pepper, any kind, chopped
  • 2 cups water
  • seasonings (salt, pepper, poultry seasonings)

Directions:

  1.  Divide butter and use 1 Tbsp. to coat bottom of the pressure cooker’s pot.
  2. Pour 2 cups water into the pot.
  3. Place the turkey inside the pot, breast side up. Stuff the cavity with the onion, garlic, celery, pepper, and carrot.
  4. Gently separate the skin from the breast meat and insert 1½ tsp. butter on either side of the wishbone.
  5. Generously sprinkle turkey with salt, pepper, and poultry seasoning.
  6. Seal pressure cooker and bring to pressure. On the PPCXL, select Chicken/Meat and adjust time to 45 minutes.
  7. When the turkey has cooked for 45 minutes under pressure, remove from heat (or hit Cancel button) and allow pressure to drop completely on its own (approximately 15 minutes).
  8. Carefully remove the turkey from the pot using lifters or two sets of tongs. Place on a carving board and cover loosely with foil.
  9. Strain the cooking liquid and reserve for making gravy, soup, and/or dressing.
  10. Allow turkey to rest another 10-15 minutes before carving. Serve and enjoy!

Stuff cavity of turkey with aromatics.

Set time for 40 – 45 minutes (we like fall-off-the-bone turkey)

Success! But for prettier presentation and crispy skin, place turkey under a broiler for 5 – 10 minutes.


Leave a comment

Filed under Healthful Eating, kitchen equipment, pressure cooking, Instant Pot, Recipes, Turkey Recipes

Easy Weeknight Pot Roast

We don’t eat much red meat, but when we do, I splurge. I buy only meat from grass-fed livestock that has no added hormones or antibiotics. We enjoy pot roast, but a traditional recipe cooks hours. I’m about “hasty” meals, so here’s my version. I promise it’s just as yummy as the slow-cooker version. Using a packet of soup mix saves time with your spices. It’s all there, including salt and pepper. You need only an hour total for this Hasty Tasty Meal.

RECIPE

Easy Weeknight Pot Roast

I use a pressure cooker to reduce cooking time. Since so many of you have asked for Instant Pot meals, I used my 6-quart Instant Pot. However, the recipe works in any pressure cooker, electric or stovetop.

Ingredients:

  • 1 – 2 pound beef roast, any cut
  • cooking spray (I prefer Pam®)
  • 1 packet dehydrated (low-sodium if available) onion soup mix
  • 2 medium russet potatoes, quartered (or 6 whole baby Yukon golds if you prefer). Peel if you want, but after cooking, the skins slide off easily.
  • 2 yellow onions, quartered or roughly chopped
  • 2 sweet peppers, sliced (optional)
  • 1 clove garlic, minced
  • 2 Tbsp. Tomato paste
  • 1 cup chicken broth (Yes, chicken broth* not beef broth) or water
  • ½ pound carrots (I prefer Bunny Luv Organic)
  • Slurry of 1 Tbsp. corn starch mixed in 2 ounces cold water

Directions:

  1. Preheat the pot using the sauté setting. When the display reads Hot, spray generously with cooking spray and add onions.
  2. Using the dehydrated onion soup mix, dry-rub the meat thoroughly.
  3. Slice meat into 1½ to 2 inch pieces. Add meat to the pot to brown.
  4. After a couple of minutes, turn off the Instant Pot. Add garlic and tomato paste. Stir.
  5. Pour in the broth. Using a wooden spoon, deglaze the pot, incorporating the flavors into the broth. Add sweet peppers if using.
  6. Place the potatoes on top the meat.
  7. Seal the Instant Pot and program (using either the meat or manual buttons) for 30 minutes. If your model has two pressure settings, select high (which is the default).
  8. While meat cooks, prepare the slurry, and slice carrots into 1″ pieces.
  9. After 30 minutes, hit Cancel and allow pressure to drop on its own for 10 minutes. Then release remaining pressure and carefully open the pot.
  10. Add the carrots, replace seal, and return the Instant Pot to pressure for 0 minutes. Allow pressure to drop on its own completely before opening the pot.
  11. Using a large spatula, lift the meat, potatoes, and carrots onto a platter. Tent with foil to keep warm.
  12. Using the sauté button (Never cover the pot with the lid while using the sauté function), bring cooking liquid to a boil and whisk in the cornstarch slurry. As soon as the liquid begins to thicken, turn off the pot, remove it (careful! Use your silicone mittens for this) to a heatsafe trivet or folded towel, and gently pour it into a measuring cup or gravy boat to serve.
  13. Serve platter with a drizzle of the gravy and a dinner roll.100_1510

Why use chicken broth instead of beef? Unfortunately, I’ve yet to find a store-bought beef broth that tasted good. There’s an artificial, almost “tinny” taste to it. Yet chicken broth or stock is mild and actually brings out the umami flavor of the meat. If you have neither, use water. It’s only a cup and it’s better to go plain than bad-tasting for your cooking liquid.

Leave a comment

Filed under cooking, Healthful Eating, kitchen equipment, potatoes, pressure cooking, Instant Pot, Roast beef